



To make marble press on nails, you base coat and colour a set of full cover tips in thin layers of gel polish, pull strips of colour down each tip with a trident brush to create the marble, then seal with a flexible top coat. In this tutorial Kirsty finishes hers with matte top coat, foil and stones.
Want press on nails you can design yourself and wear again and again? They are quicker than a full set on yourself, they can be reused, and you can make them in any colours.
Kirsty makes hers for events when she cannot wear long nails all the time. Below you'll find the products, each step with its place in the video, and her tips.
At a Glance
- Design: dark matte tips with a blue and white marble, a foil line and stones
- Artist: Kirsty
- Technique: gel polish marble pulled with a trident brush on full cover tips
- Key products: Ocean Ridge, Forget Me Not, Winter Sea, Cinders Slippers, Snow White, Forbidden Garden, Ultra Matte Top Coat, NF-002 Holographic Silver Transfer Foil, Nail Art Brush - Trident
- Video length: about 21 and a half minutes
Why You'll Love These Marble Press On Nails
- Quicker than sculpting a full set of extensions.
- Reusable, so you can take them off and wear them again.
- Easy marble effect using a trident brush.
- Works in any colour palette.
Products Used in This Video


How to Create Marble Press On Nails
1. Prep the tips
Buff full cover tips lightly, wipe with Gel Residue Wipe-off Solution, apply Base Coat and cure. You can put all the tips on a piece of metal and cure them together. Watch this step at 1:00
2. Apply the base colour
Apply two coats of Ocean Ridge. Kirsty chose a dark colour because she loves it matte. Clear tips may need three coats, so use thin layers rather than one thick layer, as thicker product is more likely to peel. Watch this step at 2:30
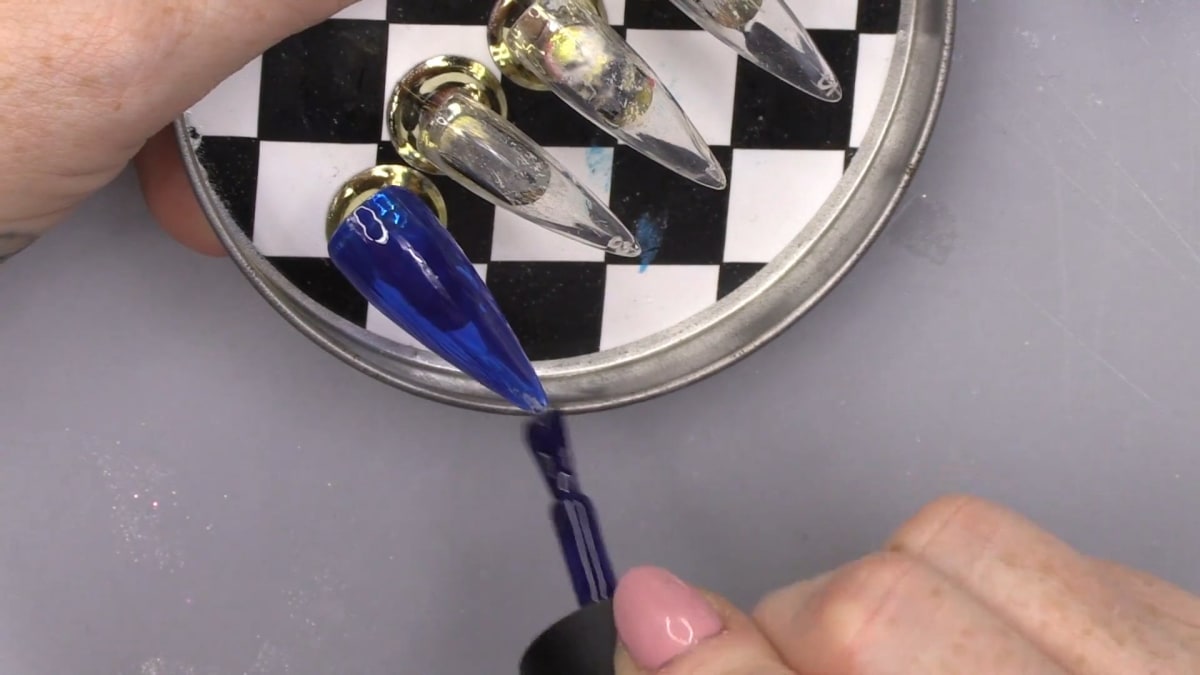
3. Lay out the marble colours
Take the backing paper from a form and lay down separated strips of Ocean Ridge, white, Cinders Slippers and the blues, using a lighter colour to separate them. Watch this step at 5:00
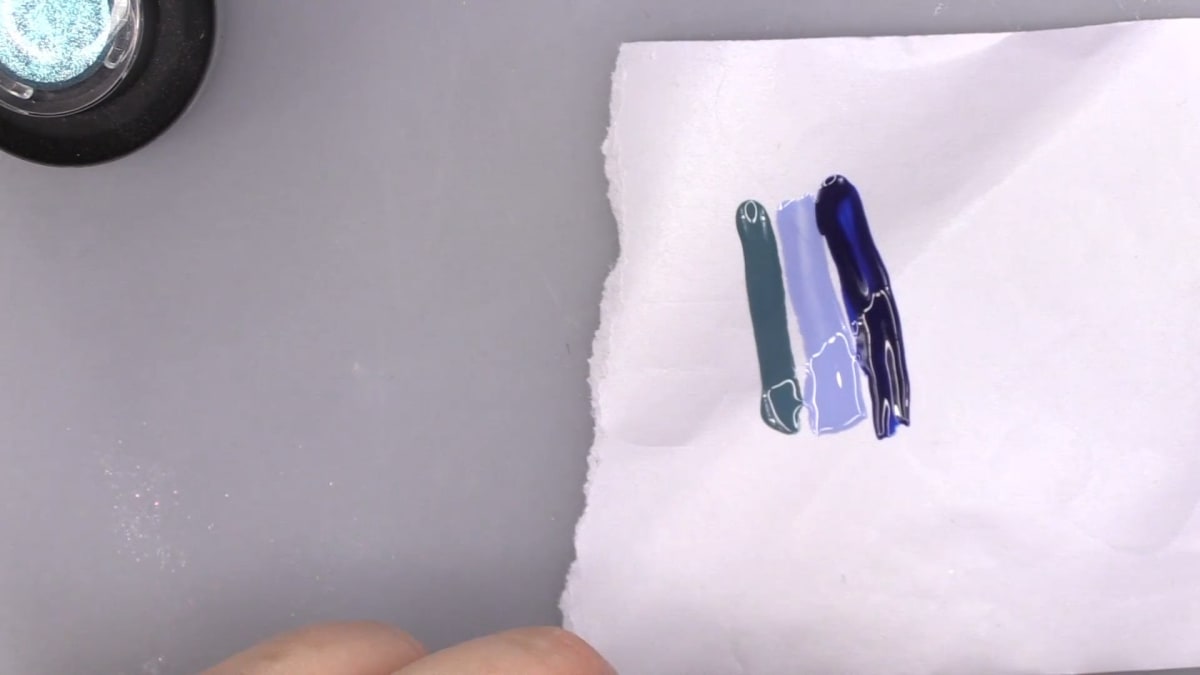
4. Pull the marble
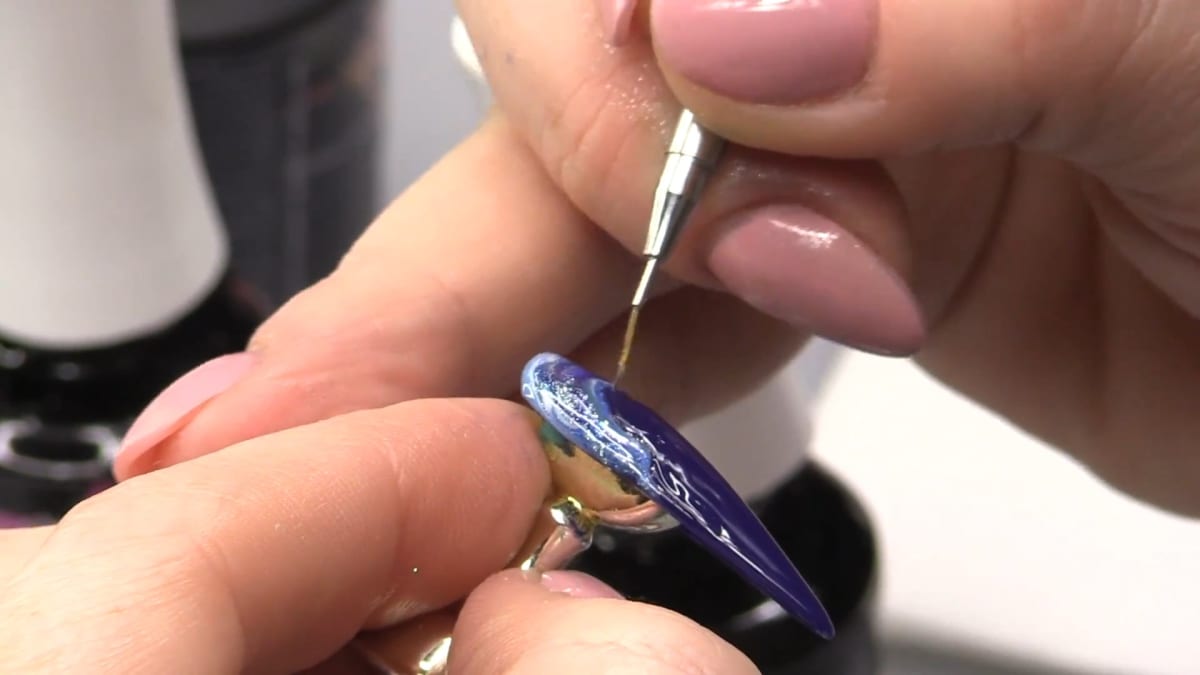
Pick up the colour with a trident brush, start at the top of the nail and slowly bring it down with a gentle twist to create the marble. Keep the brush flat and draw the colour through until you are happy. Cure. If the effect is too solid, go back through it. Keep the marble uneven at the top, as it looks more effective. Watch this step at 11:30
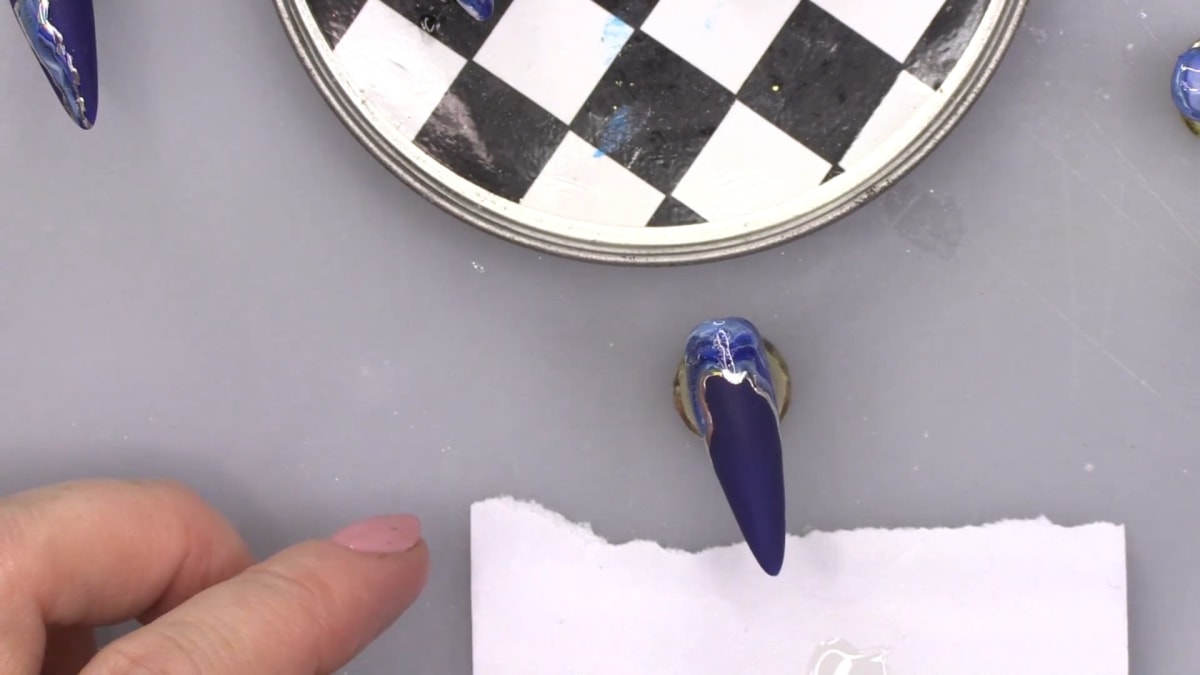
5. Top coat the marble and matte the solid colour
Apply Top Coat over the marbled section and Ultra Matte Top Coat over the solid colour, teasing each up to the edge of the marble with a small brush. Watch this step at 11:40
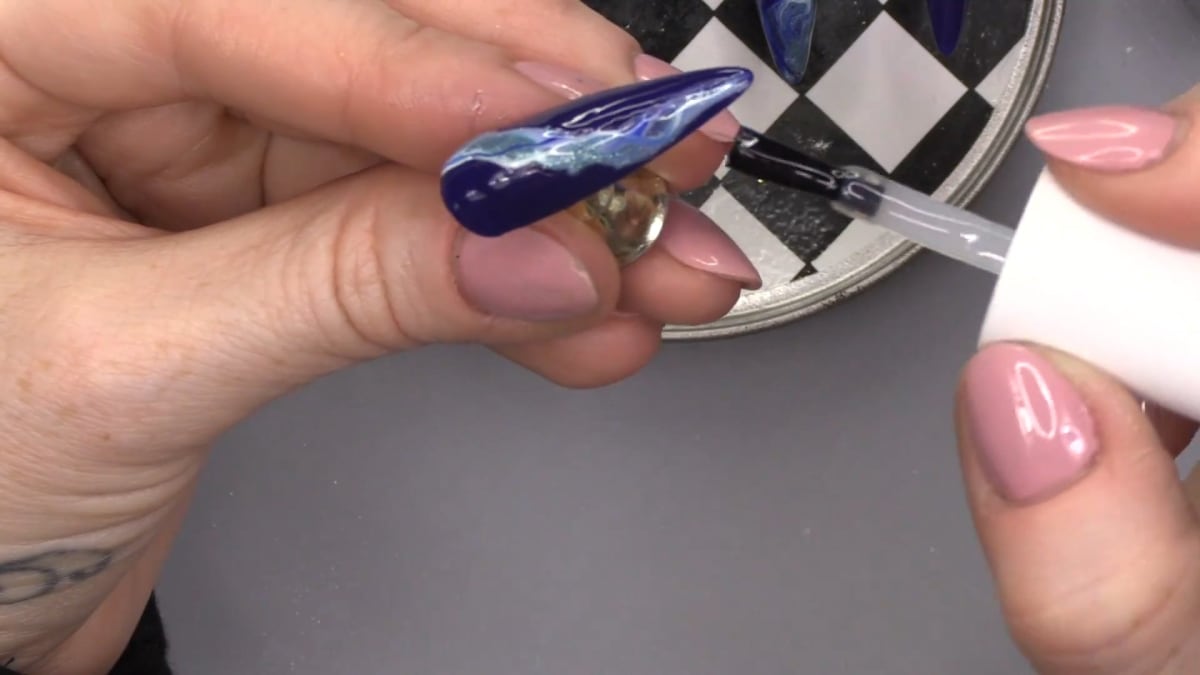
6. Add the foil
Trickle Foil Glue between the marble and solid colour and cure. Clean the matte side of the foil with a little Gel Residue Wipe-off Solution, then press the foil on and pull off. Use a clean piece of foil on every nail. Wipe off any stray transfer, then seal with a thin layer of Top Coat.
7. Seal with a flexible top coat
Use the Urban Graffiti Top Coat over the gel polish, because it is flexible. Mega Gloss would be too rigid and could crack on these flexible nails.
8. Add the stones
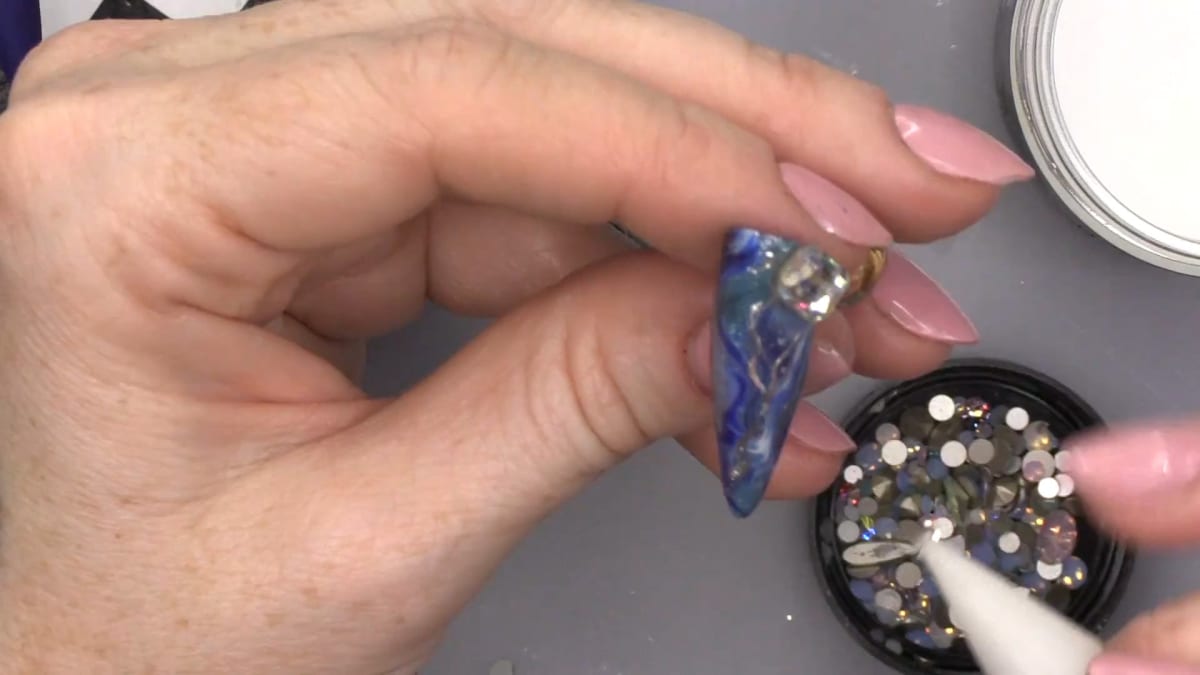
Place a big stone on with a bead of clear acrylic, add a little AcryGel around the edge to help hold it and adhere more stones, then add Top Coat. Press more stones into the gel, using Gel Residue Wipe-off Solution on a brush to move the AcryGel where you want it. Cure and add matte where needed. Watch this step at 18:20
9. Apply the press ons
Use sticky tabs or glue to put them on. Kirsty made these to fit over her existing nails. Watch this step at 21:00
Where to find each stage of the Marble Press On Nails video
| Stage | Time |
|---|---|
| Prepping the tips | 1:00 |
| Ocean Ridge base colour | 2:30 |
| Laying out the marble colours | 5:00 |
| Foil line | 10:50 |
| Pulling the marble | 11:30 |
| Top coat and matte top coat | 11:40 |
| Stones | 18:20 |
| Applying the press ons | 21:00 |
Pro Tips
- Use thin layers of gel polish so the nails do not peel.
- Clean the trident brush with Gel Residue Wipe-off Solution on a lint-free pad when colours get too mixed.
- Do not try to neaten the edges around the marble, as irregular looks better.
- Use a flexible top coat over gel polish press ons.
Common Mistakes
- Using one thick layer of colour instead of thin layers, which is more likely to peel.
- Using a rigid top coat such as Mega Gloss, which can crack on flexible press ons.
Who Is This Design For?
Press on nails suit anyone who wants a quick, reusable, dressed-up set for events without a full salon appointment. They are also a low-pressure way to practise marble nail art off the hand.
Ways to Make It Your Own
- Try a khaki palette for an army-style marble.
- Swap the foil colour or leave it off.
- Choose any marble colours from your gel polish collection.
Aftercare
Because these are reusable, store them carefully and remove them gently so they can be worn again.
Frequently Asked Questions
How do you make marble press on nails?
Base coat full cover tips, apply thin coats of a base colour, lay strips of gel polish on backing paper and pull them down each tip with a trident brush, cure, then seal with a flexible top coat.
Why use thin coats on press ons?
Thick product is more likely to peel and may not cure fully, which stops you reusing the nails.
Can I use Mega Gloss over gel polish press ons?
Kirsty says not, because it is too rigid and may crack. Use the flexible Urban Graffiti Top Coat.
How do I attach press ons?
You can use sticky tabs or glue.
Which brush makes the marble?
A trident brush, kept flat and brought down the nail with a gentle twist.
What if the marble looks too solid?
Go back through it with the brush.
Can press ons be reused?
Yes. Store them carefully and remove them gently so they can be worn again.
Give Marble Press On Nails a Try
Watch the gel polish tutorial above and follow along to make your own set.


